In my career, someone once said to me, “CI/CD is dead, long live CI/CD.” Of course, this phrase doesn’t mean it’s completely dead. It simply means CI/CD is now becoming the standard for software development, a common practice developers should adopt and learn during a software development life cycle. It is now considered part of your development process as opposed to being a shiny, new process.
In this chapter, we’ll review what Continuous Integration/Continuous Deployment (CI/CD) means and how to prepare your code for a pipeline. Once we’ve covered the necessary changes to include in your code, we’ll discuss what a common pipeline looks like for building software. Once we understand the pipeline process, we’ll look at two ways to recover from an unsuccessful deployment and how to deploy databases. We’ll also cover the three different types of cloud services available to you (on and off-premises and hybrid) and review a list of the top CI/CD providers on the internet. Finally, we’ll walk you through the process of creating a build for a sample application, along with other types of projects.
In this chapter, we will cover the following topics:
After you’ve completed this chapter, you’ll be able to identify flaws in software when you’re preparing code for software deployment, understand what a common pipeline includes in producing quality software, identify two ways of recovering from an unsuccessful deployment, know how to deploy databases through a pipeline, understand the different types of CI/CD providers, and know some key players in the CI/CD provider space.
Finally, we’ll walk through a common pipeline in Azure Pipelines to encompass everything we’ve learned in this chapter.
For this chapter, the only technical requirements include having access to a laptop and an account for one of the cloud providers mentioned in the CI/CD providers section (preferably Microsoft’s Azure Pipelines – don’t worry, it’s free).
Once you have reviewed how pipelines are created, you’ll be able to apply the same concepts to other cloud providers and their pipeline strategies.
In this section, we’ll learn about what continuous integration and continuous deployment mean to developers.
Continuous Integration (CI) is the process of merging all developers’ code into a mainline to trigger an automatic build process so that you can quickly identify issues with a code base using unit tests and code analysis.
When a developer checks their code into a branch, it’s reviewed by peer developers. Once accepted, it’s merged into a mainline and automatically starts a build process. This build process will be covered shortly.
Continuous Deployment (CD) is the process of consistently creating software to deploy it at any time.
Once everything has been built through the automated process, the build prepares the compiled code and creates artifacts. These artifacts are used for consistent deployments across various environments, such as development, staging, and production.
The benefits of implementing a CI/CD pipeline outweigh not having one:
In this section, we reviewed the definition of what continuous integration and continuous deployment mean when developing software in an automated fashion and the benefits of implementing a CI/CD pipeline.
In the next section, we’ll learn about certain code practices to avoid when automating software builds.
In this section, we’ll cover certain aspects of your code and how they could impact the deployment of your software. Such software issues could include code not compiling (broken builds), avoiding relative path names, and making sure you wrote proper unit tests. These are a couple of the common errors I’ve experienced over the years; in this section, I’ll also provide solutions on how to fix them.
Before we review a CI pipeline, there are a few caveats we should address beforehand. Even though we covered a lot in the previous chapter regarding version control, your code needs to be in a certain state to achieve “one-button” builds.
In the following sections, you’ll learn how to prepare your code so that it’s “CI/CD-ready” and examine the problems you could experience when deploying your software and how to avoid them.
If a new person is hired and starts immediately, you want them to hit the ground running and begin developing software without delay. This means being able to point them to a repository and pull the code so that you can immediately run the code with minimal setup.
I say “minimal setup” because there may be permissions involved to gain access to certain resources in the company so that they can be run locally.
Nevertheless, the code should be in a runnable state, send you to a simple screen of some kind, and notify the user to follow up on a permissions issue or provide some notification to resolve the problem.
In the previous chapter, we mentioned how the code should compile at all times. This means the following:
These standards allow your pipeline to fall into the pit of success. They help you create a build even faster and easier when your code is in a clean state.
One of the troublesome issues I’ve seen over the years when it comes to web applications is how files are accessed in a web application.
I’ve also seen file-based operations through a web page, where files were moved using relative paths and it went wrong. It involved deleting directories and it didn’t end well.
For example, let’s say you had a relative path to an image, as follows:
../images/myimage.jpg
Now, let’s say you’re sitting on a web page, such as https://localhost/kitchen/chairs
.
If you went back one directory, you’d be in the kitchen with a missing image, not at the root of the website. According to your relative path, you’re looking for an image directory at https://localhost/kitchen/images/myimage.jpg
.
To make matters worse, if you’re using custom routing, this may not even be the normal path, and who knows where it’s looking for the image.
The best approach when preparing your code is to use a single slash (/
) at the beginning of your URL since it’s considered “absolute:”
/images/myimage.jpg
This makes it easier to navigate to the root when you’re locating files on a website, regardless of what environment you’re in. It doesn’t matter if you are on https://www.myfakewebsite.com/ or http://localhost/, the root is the root, and you’ll always find your files when using a single slash at the beginning of your sources.
Tests in your code are created to provide checks and balances so that your code works as expected. Each test needs to be examined carefully to confirm it isn’t doing anything out of the ordinary.
Unit tests are considered tests against code in memory, whereas integration tests are tests that require ANY external resources:
As you’re beginning to surmise, when you build your application on another machine, cloud services do not have access to your database server and also may not have the additional files you need for each test to pass.
If you are accessing external resources, it may be a better approach to refactor your tests into something a little more memory-driven. I’ll explain why in Chapter 7, when we’ll cover unit testing.
Whether you are in the middle of a project or are clicking Create New Project… for the first time, you need a way to create environment settings for your web application.
In ASP.NET Core applications, we are given appsettings.json
and appsettings.Development.json
configuration files out of the box. The appsettings.json
file is meant to be a base configuration file and, depending on the environment, each appsettings
file is applied and only existing properties are overwritten to the appsettings.json
file.
One common example of this is connection strings and application paths. Depending on the environment, each file will have its own settings.
The environments need to be defined upfront as well. There will always be a development and release environment. There may be an option to create another environment called QA on another machine somewhere, so an appsettings.qa.json
file would be required with its own environment-specific settings.
Confirm that these settings have been saved for each relevant environment since they are important in a CI/CD pipeline. These environment settings should always be checked into version control with your solution/project to assist the pipeline in deploying the right settings to the right environment.
In this section, we covered ways to prepare your code for a CI/CD pipeline by making sure we can build immediately after cloning or pulling the repository down locally, why we should avoid relative-based file paths, and confirmed we were using environment-specific application settings, making it easy to build and deploy our application.
With your code checked in, we can now move forward and describe all of the stages of a common pipeline.
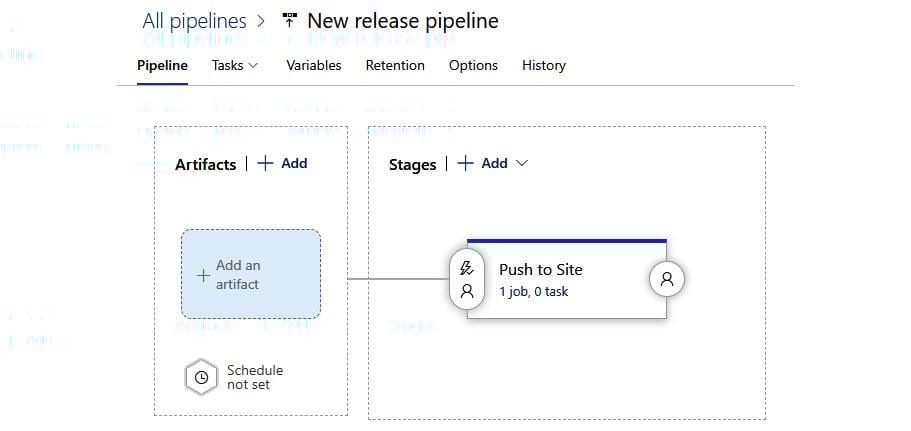
In this section, we’ll cover the steps of what a common pipeline includes for building software when using a CI/CD service. When you reach the end of this section, you’ll understand every step of the process in a common pipeline so that you can produce quality software.
A CI pipeline is a collection of steps required to code, build, test, and deploy software. Each step is not owned by a particular person but by a team working together and focusing on the goal to produce exceptional software. The good news is that if you followed the previous chapter’s recommendations, you’re already ahead of the game.
Each company’s pipeline can vary from product to product, but there will always be a common set of steps for a CI process. It depends on how detailed your pipeline becomes based on your needs. The stages in the pipelines can be influenced by each stakeholder involved in the process. Of course, pulling code and building and testing are required for the developers, but a QA team requires the finished product (artifact) to be sent to another server for test purposes.
Figure 2.1 shows one common pipeline:
Figure 2.1 – One example of a build pipeline
As shown in Figure 2.1, the process is sequential when creating a software deployment. Here’s a summary of the steps:
Now that we’ve defined a common pipeline, let’s dig deeper into each step to learn what each process includes when you’re building your software.
In the following subsections, we’ll examine each process in detail based on the steps defined here.
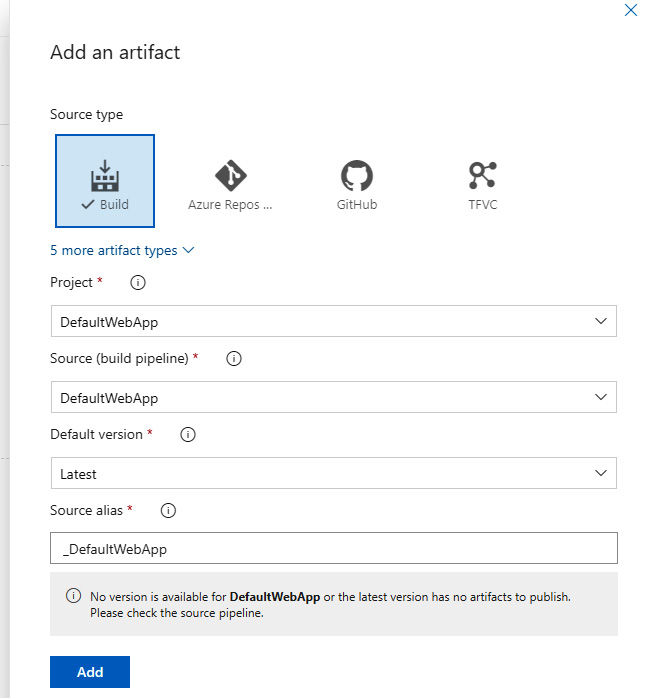
Before we build the application, we need to identify the project we’re building in our pipeline. The pipeline service requires a repository location. Once you’ve provided the repository URL, the service can prepare the repository for compilation on their server.
In the previous section, we mentioned why your code needs to compile flawlessly after cloning. The code is cloned and built on a completely different machine from yours. If the application only works on your computer and no one else’s, as the saying goes, “We’ll have to ship your computer to all of our users.” While this is a humorous saying in the industry, it’s generally frowned upon when writing and deploying software in the real world.
Each of the DevOps services has its benefits. For example, Azure Pipelines can examine your repository and make assumptions based on the structure of your project.
After analyzing the project, it uses a file format called YAML (pronounced Ya-mel) to define how the project should be built. While YAML is now considered a standard in the industry, we won’t deep-dive into everything YAML encompasses. YAML functionality could be a book on its own.
Azure takes your project’s assumptions and creates a YAML template on how it should build your application.
It knows how to compile the application, identify whether a container is included in the project, and also retrieve NuGet packages before performing the build.
One last thing to mention is that most DevOp services allow one repository per project. The benefits of this approach include the following:
With that said, we are now ready to build the application.
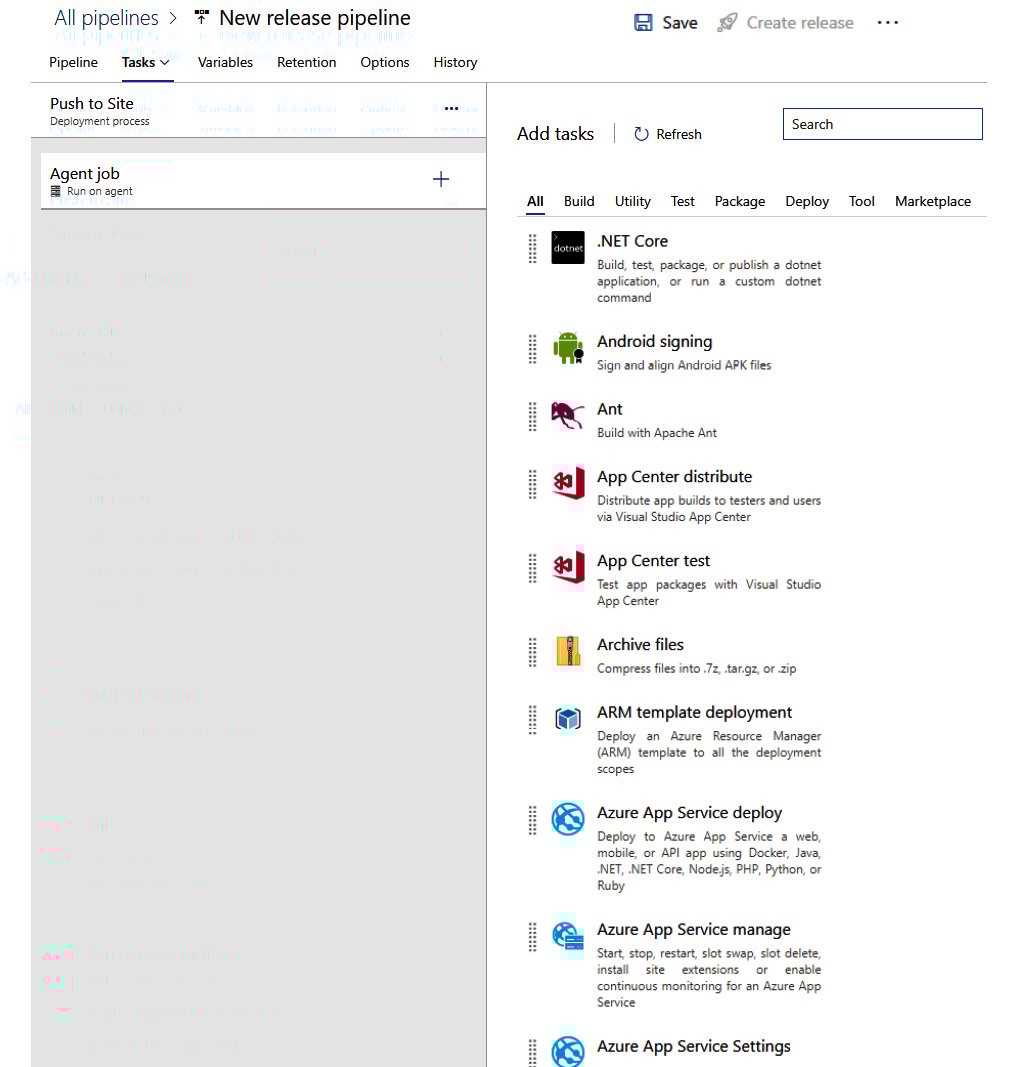
As mentioned previously, YAML files define how the service proceeds with building your application.
It’s always a good practice to confirm the YAML file contains everything you need before building. If you have a simple project, the boilerplate included in the wizard may be all you need, but it allows you to make updates in case additional files are required, or other application checks.
It may take a couple of attempts to massage the YAML file, but once you get the file in a stable state, it’s great to see everything work as expected.
Make sure you have retrieved all your code before building the application. If this step fails, the process kicks out of the pipeline.
If you checked in bad code and the build fails, the proper authorities (developers or administrators) will be notified based on the alert level and you’ll be given the dunce hat or the stuffed monkey for breaking the build until someone else breaks it.
Next, we’ll focus on running unit tests and other tests against the application.
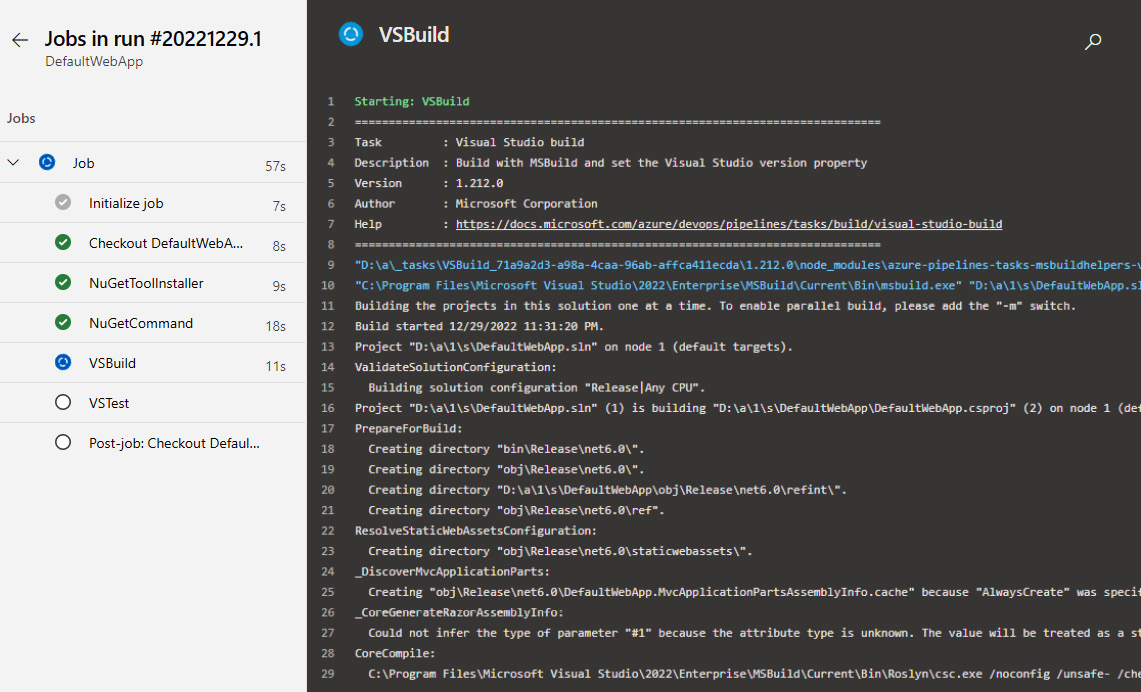
Once the build is done, we can move forward with the unit tests and/or code analysis.
Unit tests should run against the compiled application. This includes unit tests and integration tests, but as we mentioned previously, be wary of integration tests. The pipeline services may not have access to certain resources, causing your tests to fail.
Unit tests, by nature, should be extremely fast. Why? Because you don’t want to wait for 30 minutes for unit tests to run (which is painful). If you have unit tests taking that long, identify the longest-running unit tests and refactor them.
Once the code has been compiled and loaded, unit tests should be running every 10-30 seconds as a general guideline since they are memory-based.
While unit and integration tests are common in most testing scenarios, there are additional checks you can add to your pipeline, which include identifying security issues and code metrics to generate reports at the end of your build.
Next, our build creates artifacts to be used for deployments.
Once the build succeeds and all of the tests pass, the next step is to create an artifact of our build and store it in a central location.
As a general rule, it’s best to only create your binaries once. Once they’ve been built, they’re available at a moment’s notice. These artifacts can deploy a version to a server on a whim without going through the entire build process again.
The artifacts should be tamper-proof and never be modified by anyone. If there is an issue with the artifact, the pipeline should start from the beginning and create a new artifact.
Let’s move on to containers.
Once you have created the self-contained artifact, an optional step is to build a container around it or install the artifact in the container. While most enterprises use various platforms and environments, such as Linux or Windows, “containerizing” an application with a tool such as Docker allows it to run on any platform while isolating the application.
With containers considered a standard in the industry, it makes sense to create a container so that it can easily be deployed to any platform, such as Azure, Amazon Web Services (AWS), or Google Cloud Provider. Again, this is an optional step, but it’s becoming an inevitable one in the industry.
When creating a new project with Visual Studio, you automatically get a container wrapper through a generated Docker file. This Dockerfile defines how the container will allow access to your application.
Once you’ve added the Dockerfile to your project, Azure identifies this as a container project and creates the container with the included project.
Lastly, we’ll examine deploying the software.
Once everything has been generated, all we need to do is deploy the software.
Remember the environment settings in your appsettings.json
file? This is where they come in handy for deployments.
Based on your environment, you can assign a task to merge the appropriate environment JSON file into the appsettings.json
file on deployment.
Once you have your environment settings in order, you can define the destinations of your deployments any way you like.
Deployments can range from FTP-ing or WebDeploy-ing the artifact or pushing the container to a server somewhere. All of these options are available out of the box.
However, you must deploy the same way to every environment. The only thing that changes is the appsettings
file.
After a successful (or unsuccessful) deployment, a report or notification should be sent to everyone involved in the deployment’s outcome.
In this section, we learned what a common pipeline includes and how each step relies on a successful previous step. If one step fails throughout the pipeline, the process immediately stops. This “conveyor belt” approach to software development provides repeatable steps, quality-driven software, and deployable software.
In this section, we’ll learn about two ways to recover from a failed software deployment. After finishing this section, you’ll know how to use these two approaches to make a justified decision on recovering from a bad deployment.
In a standard pipeline, companies sometimes experience software glitches when deploying to a web server. Users may see an error message when they perform an action on the website.
What do you do when the software doesn’t work as expected? How does this work in the DevOps pipeline?
Every time you build software, there’s always a chance something could go wrong. You always need a backup plan before the software is deployed.
Let’s cover the two types of recovery methods we can use when software deployments don’t succeed.
If various bugs were introduced into the product and the previous version doesn’t appear to have these errors, it makes sense to revert the software or fall back to the previous version.
In a pipeline, the process at the end creates artifacts, which are self-contained, deployable versions of your product.
Here is an example of falling backward:
This type of release is called falling backward.
If you have to replace a current version (v1.3) with a previous version (v1.1) (except for databases, which I’ll cover in a bit), you can easily identify and deploy the last-known artifact.
If the fallback approach isn’t a viable recovery strategy, the alternative is to fall forward.
When falling forward, the product team accepts the deployment with errors (warts and all) and continues to move forward with newer releases while placing a high priority on these errors and acknowledging the errors will be fixed in the next or future release.
Here is a similar example of falling forward:
This type of release is called falling forward.
The product team may have to examine each error and make a decision as to which recovery method is the best approach for the product’s reputation.
For example, if product features such as business logic or user interface updates are the issue, the best recovery method may be to fall forward since the impact on the system is minimal and a user’s workflow is not interrupted and productive.
However, if code and database updates are involved, the better approach would be to fall back – that is, restore the database and use a previous version of the artifact.
If it’s a critical feature and reverting is not an option, a “hotfix” approach (as mentioned in the previous chapter) may be required to patch the software.
Again, it depends on the impact each issue has left on the system as to which recovery strategy is the best approach.
In this section, we learned about two ways to recover from unsuccessful software deployments: falling backward and falling forward. While neither option is a mandatory choice, each approach should be weighed heavily based on the error type, the recovery time of the fix, and the software’s deployment schedule.
Deploying application code is one thing but deploying databases can be a daunting task if not done properly. There are two pain points when deploying databases: structure and records.
With a database’s structure, you have the issue of adding, updating, and removing columns/fields from tables, along with updating the corresponding stored procedures, views, and other table-related functions to reflect the table updates.
With records, the process isn’t as tricky as changing a table’s structure. The frequency of updating records is not as regular, but when it does, happen that’s when you either want to seed a database with default records or update those seed records with new values.
The following sections will cover some common practices when deploying databases in a CI/CD pipeline.
Since company data is essential to a business, it’s mandatory to back it up before making any modifications or updates to the database.
One recommendation is to make the entire database deploy a two-step process: back up the database, then apply the database updates.
The DevOps team can include a pre-deployment script to automatically back up the database before applying the database updates. If the backup was successful, you can continue deploying your changes to the database. If not, you can immediately stop the deployment and determine the cause of failure.
As discussed in the previous section, this is necessary for a “fallback” approach instead of a “fall forward” strategy.
One strategy for updating a table is to take a non-destructive approach:
While making the appropriate changes to table structures, don’t forget about updating the additional database code to reflect the table changes, including stored procedures, views, and functions.
If your Visual Studio solution connects to a database, there’s another project type you need to add to your solution called the Database Project type. When you add this project to your solution, it takes a snapshot of your database and adds it to your project as code.
Why include this in your solution? There are three reasons to include it in your solution:
As you can see, it’s pretty handy to include with your solution.
Entity Framework has come a long way since its early days. Migrations are another way to include database changes through C# as opposed to T-SQL.
Upon creating a migration, Entity Framework Core takes a snapshot of the database and DbContext
and creates the delta between the database schema and DbContext
using C#.
With the initial migration, the entire C# code is generated with an Up()
method.
Any subsequent migrations will contain an Up()
method and a Down()
method for upgrading and downgrading the database, respectively. This allows developers to save their database delta changes, along with their code changes.
Entity Framework Core’s migrations are an alternative to using DACs and custom scripts. These migrations can perform database changes based on the C# code.
If you require seed records, then you can use Entity Framework Core’s .HasData()
method for easily creating seed records for tables.
In this section, we learned how to prepare our database deployment by always creating a backup, looked at a common strategy for adding, updating, and deleting table fields, and learned how to deploy databases in a CI/CD pipeline using either a DAC or Entity Framework Core’s migrations.
Now that we’ve learned how a standard pipeline works, in this section, we’ll look at the different types of pipeline providers.
The three types of providers are on-premises, off-premises, and hybrid.
On-premises (meaning on-site or on-premises) relates to the software you own, which you can use to build your product at your company’s location. An advantage of on-premises build services is that once you purchase the software, you own it; there isn’t a subscription fee. So, if there’s a problem with the build server, you can easily look at the software locally to identify and fix the problem.
Off-premises (or cloud) providers are the more common services used nowadays. Since everyone wants everything yesterday, it’s quicker to set up and is usually an immediate way to create a software pipeline.
As you can guess, hybrid services are a mix of on-premises and off-premises services. Some companies like to keep control of certain aspects of software development and send the artifacts to a remote server for deployment purposes.
While hybrid services are an option, it makes more sense to use off-premises services for automated software builds.
In this section, we learned about three types of providers: on-premises, off-premises, and hybrid services. While these services are used in various companies, the majority of companies lean toward off-premises (or cloud) services to automate their software builds.
In this section, we’ll review a current list of providers on the internet to help you automate your builds. While there are other providers available, these are considered what developers use in the industry as a standard.
Since we are targeting ASP.NET Core, rest assured, each of these providers supports ASP.NET Core in its build processes and deployments.
Since Microsoft created ASP.NET Core, it only makes sense to mention its off-premises cloud offerings. It does offer on-premises and hybrid support as well. Azure Pipelines provides the most automated support for ASP.NET Core applications and deployment mechanisms to date.
While Azure is considered one of the biggest cloud providers in the world, I consider Azure Pipelines a small component under the Azure moniker.
Important note
You can learn more about Azure Pipelines here: https://azure.microsoft.com/en-us/products/devops/pipelines/.
When Microsoft purchased GitHub back in June of 2018, GitHub came out with an automation pipeline with GitHub Actions in October of the same year.
Since GitHub is a provider of all things source code-related, GitHub Actions was considered an inevitable step toward making code deployable.
After signing up to Actions, you’ll notice the screens are very “Azure-ish” and provide a very similar interface when you’re building software pipelines.
Important note
You can learn more about GitHub Actions here: https://github.com/features/actions.
With Amazon commanding a large lead in the e-commerce landscape and with its Amazon Web Services (AWS offering), it also provides automated pipelines for developers.
Its pipelines are broken down into categories:
CodeCommit
: For identifying source code repositoriesCodeArtifact
: A centralized location for build artifactsCodeBuild
: A dedicated service for building your product based on updates in your repository, which are defined in CodeCommit
CodeDeploy
: For managing environments for deploying softwareCodePipelne
: The glue that holds it all togetherYou can pick and choose the services you need based on your requirements. Amazon CodePipeline is similar to most cloud services, where you can use one service or all of them.
Important note
You can learn more about Amazon CodePipeline here: https://aws.amazon.com/codepipeline/.
The final cloud provider is none other than Google CI. Google CI also provides the tools required to perform automated builds and deployments.
Google CI provides similar tools, such as Artifact Registry, source repositories, Cloud Build, and even private container registries.
As mentioned previously, once you understand how one cloud provider works, you’ll start to see similar offerings in other cloud providers.
Important note
You can learn more about Google CI here: https://cloud.google.com/solutions/continuous-integration.
In this section, we examined four CI/CD cloud providers: Microsoft’s Azure Pipelines, GitHub Actions, Amazon’s CodePipeline, and Google’s CI. Any one of these providers is a suitable candidate for creating an ASP.NET Core pipeline.
With everything we’ve discussed so far, this section will take us through a standard pipeline with a web application every developer should be familiar with: the ASP.NET Core web application.
If you have a web application of your own, you’ll be able to follow along and make the modifications to your web application as well.
In this section, we’ll demonstrate what a pipeline consists of by considering a sample application and walking through all of the components that will make it a successful build.
Before we move forward, we need to confirm whether the application in our version control is ready for a pipeline:
appsettings.json
, appsettings.qa.json
, and so on.)Again, the Dockerfile is optional, but most companies include one since they have numerous environments running on different operating systems. We’ll include the Dockerfile in our web application to complete the walkthrough.
Once everything has been confirmed in our checklist, we can move forward and create our pipeline.
Azure Pipelines is a free service for developers to use to automate, test, and deploy their software to any platform.
Since Azure is user-specific, you’ll have to log in to your Azure Pipelines account or create a new one at https://azure.microsoft.com/en-us/products/devops/pipelines/. Don’t worry – it’s free to sign up and create pipelines:
Figure 2.2 – The Azure Pipelines web page
Once you’ve logged in to Azure Pipelines, you are ready to create a project.
We haven’t designated a repository for Azure Pipelines to use yet. So, we need to import an existing repository:
Figure 2.3 – Importing a repository
DefaultWebApp
is in Git, I copied the clone URL and pasted it into the text box, and then clicked the Import button at the bottom of the side panel, as shown in Figure 2.4:Figure 2.4 – Identifying the repository Azure Pipelines will use
Azure Pipelines will proceed to import the repository. The next screen will be the standard Explorer view everyone is used to seeing, with a tree view on the left of your repository and a detailed list of files from the current directory on the right-hand side.
With that, we have finished importing the repository into Azure Pipelines.
Now that we’ve imported our repository, Azure Pipelines makes this process extremely easy for us by adding a button called Set up build, as shown in Figure 2.5:
Figure 2.5 – Imported repository with a “Set up build” button as the next step
As vast as Azure Pipelines’ features can be, there are several preset templates to use for your builds. Each template pertains to a particular project in the .NET ecosystem, along with not-so-common projects as well:
For the DefaultWebApp example, we don’t need to update our YAML file because we don’t have any changes; this is because we want something very simple to create our build. The default YAML file looks like this:
# ASP.NET Core (.NET Framework) # Build and test ASP.NET Core projects targeting the full .NET Framework. # Add steps that publish symbols, save build artifacts, and more: # https://docs.microsoft.com/azure/devops/pipelines/languages/dotnet-core trigger: - master pool: vmImage: 'windows-latest' variables: solution: '**/*.sln' buildPlatform: 'Any CPU' buildConfiguration: 'Release' steps: - task: NuGetToolInstaller@1 - task: NuGetCommand@2 inputs: restoreSolution: '$(solution)' - task: VSBuild@1 inputs: solution: '$(solution)' msbuildArgs: '/p:DeployOnBuild=true /p:WebPublishMethod=Package /p:PackageAsSingleFile=true /p:SkipInvalidConfigurations=true /p:DesktopBuildPackageLocation="$(build.artifactStagingDirectory)\WebApp.zip" /p:DeployIisAppPath="Default Web Site"' platform: '$(buildPlatform)' configuration: '$(buildConfiguration)' - task: VSTest@2 inputs: platform: '$(buildPlatform)' configuration: '$(buildConfiguration)'
This new file that Azure Pipelines created is called azure-pipelines.yml
. So, where does this new azure-pipelines.yml
file reside when it’s created? It’s committed to the root of your repository. Once we’ve confirmed everything looks good in the YAML file, we can click the Save and run button.
Once you’ve done this, a side panel will appear, asking you for a commit message and optional description, as well as to specify options on whether to commit directly to the master branch or create a new branch for this commit. Once you’ve clicked the Save and run button at the bottom of the side panel, it will commit your new YAML file to your repository and execute the pipeline immediately.
Once the build is running, you’ll see something similar to Figure 2.6:
Figure 2.6 – Queueing up our DefaultWebApp build process
As shown at the bottom of the preceding screenshot, my job’s status is Queued. Once it’s out of the queue and executing, you can watch the builds progress by clicking on Job next to the blue clock at the bottom.
In terms of DefaultWebApp, this is what the build process looks as seen in Figure 2.7:
Figure 2.7 – The build progress of DefaultWebApp
Congratulations! You have created a successful pipeline and artifact.
For the sake of not writing an entire book on Azure Pipelines, next, we will move on to creating releases.
With a completed and successful build, we can now focus on releasing our software. Follow these steps:
Figure 2.8 – Selecting an empty job template
There is a term in Releases called Stages where your software can go through several stages before it’s sent to the final stage. These stages can also be synonymous with environments. These stages include development, QA, staging, and production. Once one stage has been approved (development), it moves to the next stage (QA) until the final one, which is usually production. However, these stages can get extremely complicated.
As shown in Figure 2.9, we need to add an artifact:
Figure 2.9 – The Push to Site stage is defined, but there’s no artifact
Figure 2.10 – Adding the DefaultWebApp artifact to our release pipeline
Once we have defined our stages, we can attach certain deployment conditions, both before and after, to each stage. The ability to define post-deployment approvals, gates, and auto-redeploy triggers is possible but disabled by default for each stage.
In any stage, you can add, edit, or remove any task you want by clicking on the “x job, x tasks” link under each stage’s name, as shown in Figure 2.11:
Figure 2.11 – Stages allow you to add any number of tasks
Each stage has an agent job, which can perform any number of tasks. The list of tasks to choose from is mind-numbing. If you can think of it, there is a task for it.
For example, we can deploy a website using Azure, IIS Web Deploy, or even simply a file that’s been copied from one directory to another. Want to FTP the files over to a server? Click on the Utility tab and find FTP Upload.
Each task you add has parameters per topic and can easily be modified to suit a developer’s requirements.
In this section, we covered how to create a pipeline by preparing the application to meet certain requirements. We did this by introducing Azure Pipelines by logging in and adding our sample project, identifying the repository we’ll be using in our pipeline, and creating the build. Once we’d done this, we found our artifacts, created a release, and found a way to deploy the build.
In this chapter, we identified ways to prepare our code for a CI/CD pipeline so that we can build flawlessly, avoid relative path names with file-based operations, confirm our unit tests are unit tests, and create environment settings for our application. Once our code was ready, we examined what’s included in a common CI/CD pipeline, including a way to pull the code, build it, run unit tests with optional code analysis, create artifacts, wrap our code in a container, and deploy an artifact.
We also covered two ways to recover from a failed deployment using a fall-back or fall-forward approach. Then, we discussed common ways to prepare for deploying a database, which includes backing up your data, creating a strategy for modifying tables, adding a database project to your Visual Studio solution, and using Entity Framework Core’s migrations so that you can use C# to modify your tables.
We also reviewed the three types of CI/CD providers: on-premises, off-premises, and hybrid providers, with each one specific to a company’s needs, and then examined four cloud providers who offer full pipeline services: Microsoft’s DevOps Pipelines, GitHub Actions, Amazon’s CodePipeline, and Google’s CI.
Finally, we learned how to create a sample pipeline by preparing the application so that it meets certain requirements, logging in to Azure Pipelines and defining our sample project, identifying the repository we’ll be using in our pipeline, and creating the build. Once the build was complete, it generated our artifacts, and we learned how to create a release and find a way to deploy the build.
In the next chapter, we’ll learn about some of the best approaches for using middleware in ASP.NET Core.
Where there is an eBook version of a title available, you can buy it from the book details for that title. Add either the standalone eBook or the eBook and print book bundle to your shopping cart. Your eBook will show in your cart as a product on its own. After completing checkout and payment in the normal way, you will receive your receipt on the screen containing a link to a personalised PDF download file. This link will remain active for 30 days. You can download backup copies of the file by logging in to your account at any time.
If you already have Adobe reader installed, then clicking on the link will download and open the PDF file directly. If you don't, then save the PDF file on your machine and download the Reader to view it.
Please Note: Packt eBooks are non-returnable and non-refundable.
Packt eBook and Licensing When you buy an eBook from Packt Publishing, completing your purchase means you accept the terms of our licence agreement. Please read the full text of the agreement. In it we have tried to balance the need for the ebook to be usable for you the reader with our needs to protect the rights of us as Publishers and of our authors. In summary, the agreement says:
If you want to purchase a video course, eBook or Bundle (Print+eBook) please follow below steps:
Our eBooks are currently available in a variety of formats such as PDF and ePubs. In the future, this may well change with trends and development in technology, but please note that our PDFs are not Adobe eBook Reader format, which has greater restrictions on security.
You will need to use Adobe Reader v9 or later in order to read Packt's PDF eBooks.
Packt eBooks are a complete electronic version of the print edition, available in PDF and ePub formats. Every piece of content down to the page numbering is the same. Because we save the costs of printing and shipping the book to you, we are able to offer eBooks at a lower cost than print editions.
When you have purchased an eBook, simply login to your account and click on the link in Your Download Area. We recommend you saving the file to your hard drive before opening it.
For optimal viewing of our eBooks, we recommend you download and install the free Adobe Reader version 9.